
How to Install ModulON AI Chatbot
ModulON AI makes it simple to add intelligent chat support to your platform. This guide walks you through the installation process step‑by‑step, from creating your API key to embedding the widget script.
Take note: this is a general instruction. For platform‑specific details (e.g., WordPress, Shopify, custom apps), please check the full guide at the link below.
Sign-Up
1. Sign up to Modulon AI
The first step is simple. Visit the ModulON AI website and sign-up to create your account.
For Free Tier accounts - there will be some limitations.
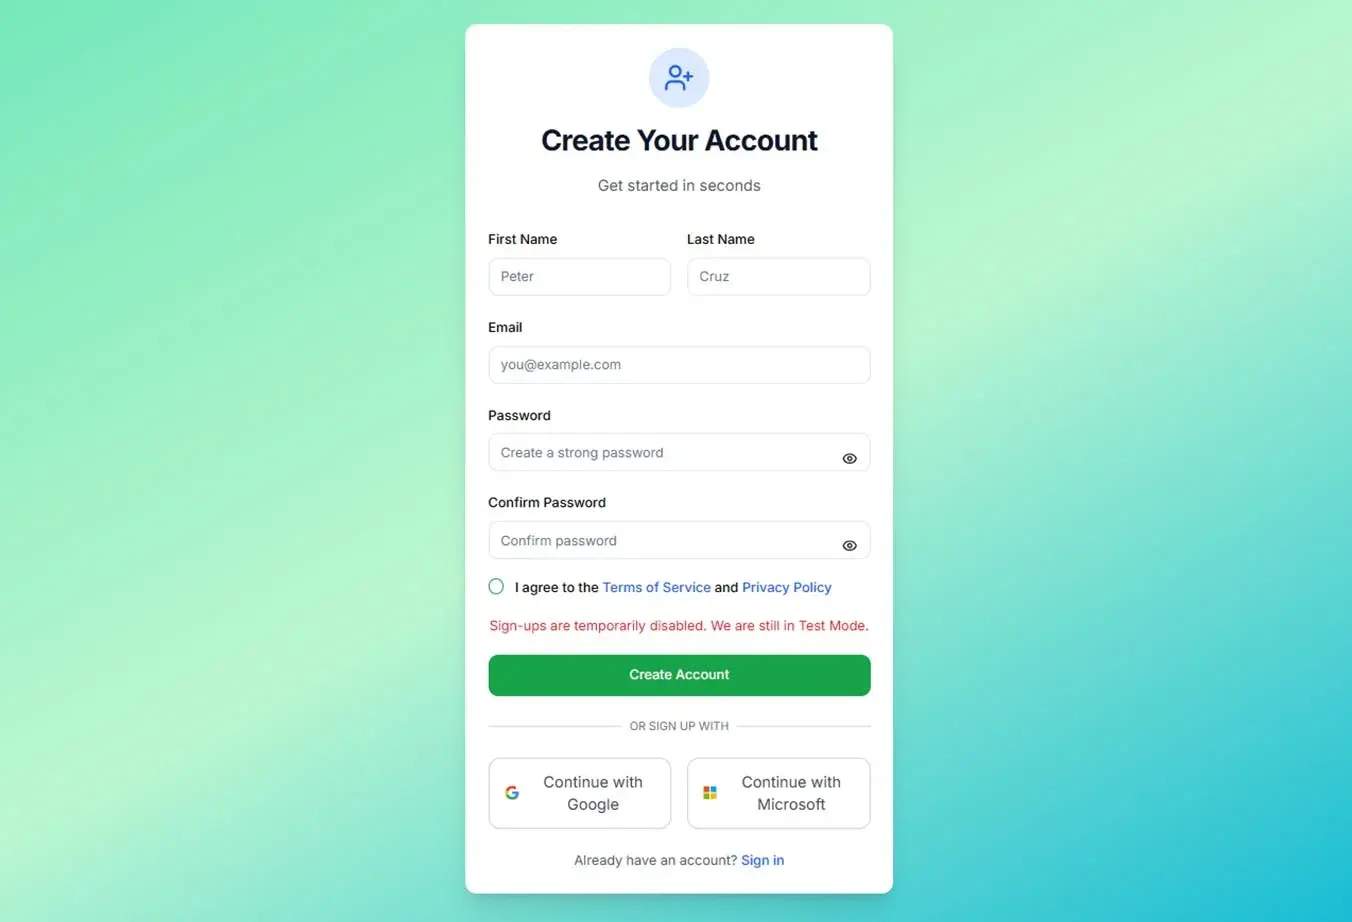
Sign Up Page - Modulon AI ChatBot
2. Verify your Account
After registration, you will receive a verification email to confirm your account (check spam folder if possible).
Once verified, you can log in to your ModulON AI account and continue to Step 3.
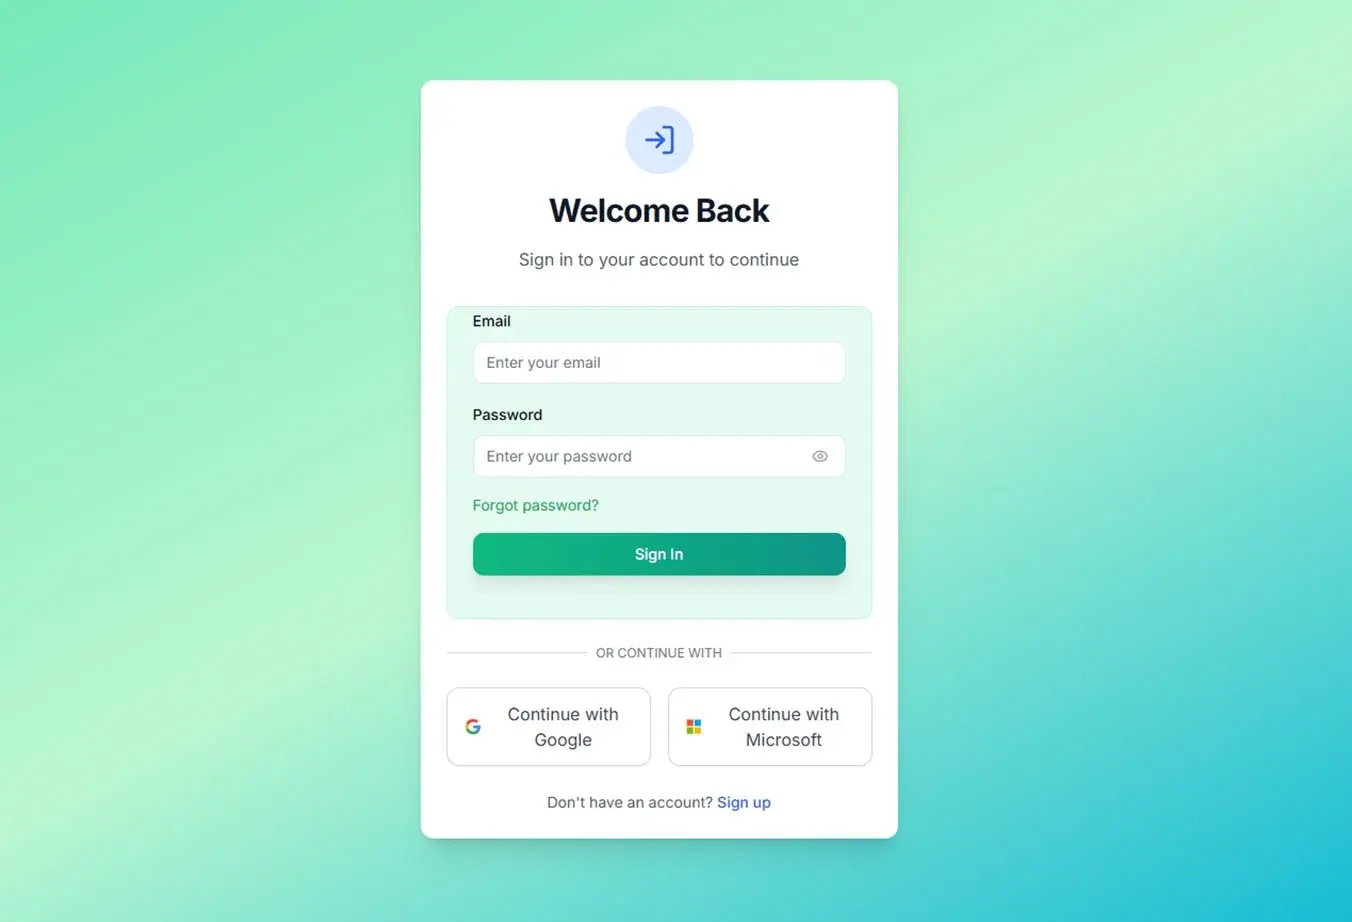
Login Page - Modulon AI ChatBot
Onboarding
3. Onboarding Process
Once your account is verified and you’ve logged in, follow the onboarding steps to get started quickly and smoothly.
Purpose
User Profile
Company Profile
Plan Selection
Billing (For Free Tier - Just click next)
Then you're set
Once onboarding is complete, you’re ready to connect ModulON AI to your platform.
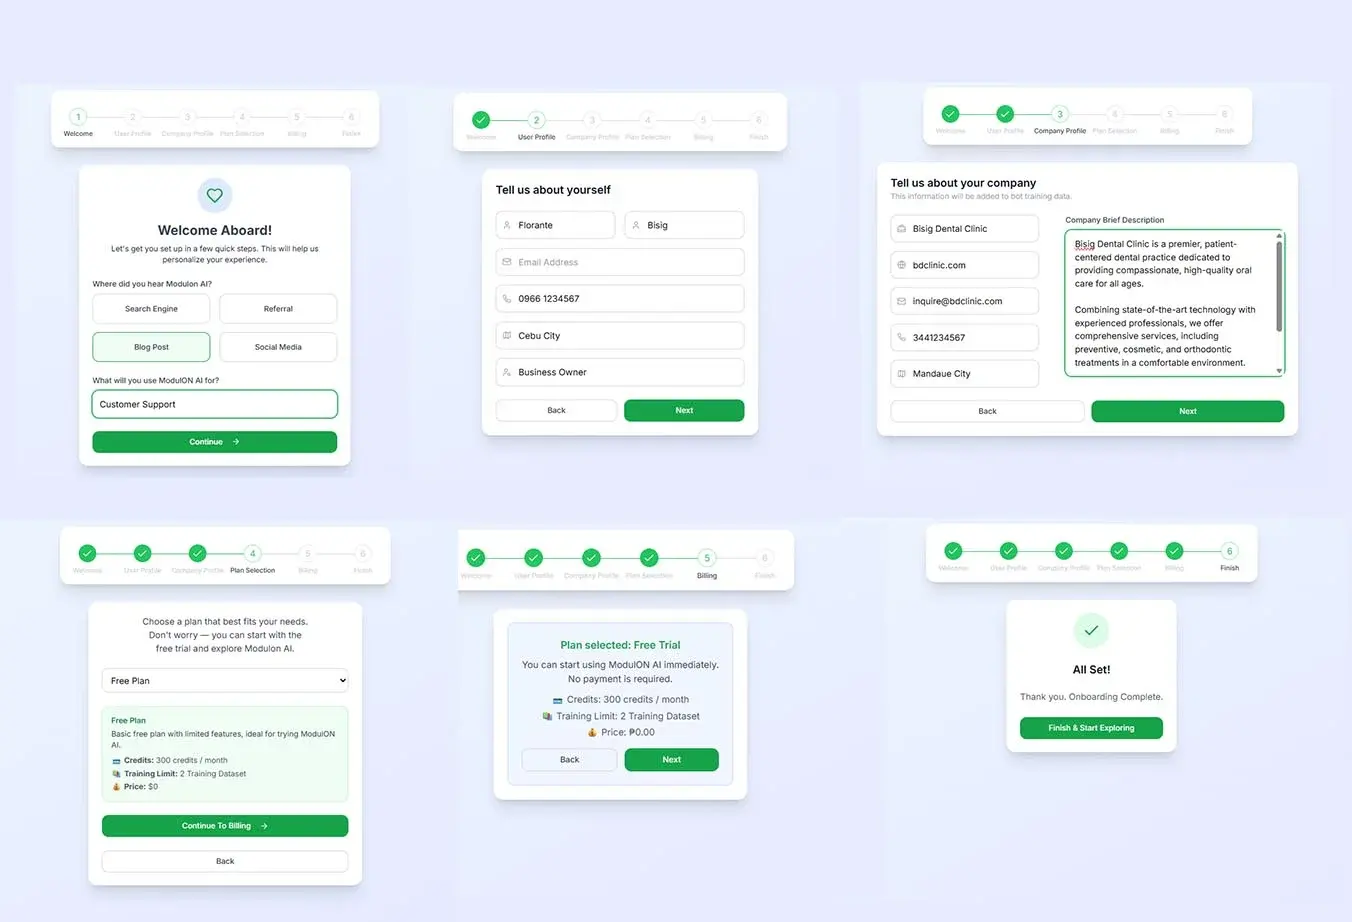
Onboarding Page - Modulon AI ChatBot
Dashboard
4. Familiarize Yourself with the Dashboard
The ModulON AI dashboard is designed to be intuitive, but knowing where everything is will save you time. Here’s a breakdown of the main areas:
Left Pane — Navigation & Settings
Access all tabs ( Overview, Modules, Analytics, People, AI Setup, Live Chat, Plan Details, User Settings and Logout Button
Top Bar — Status & Display Controls
Right Pane — Navigation & Settings
This is where you’ll spend most of your time.
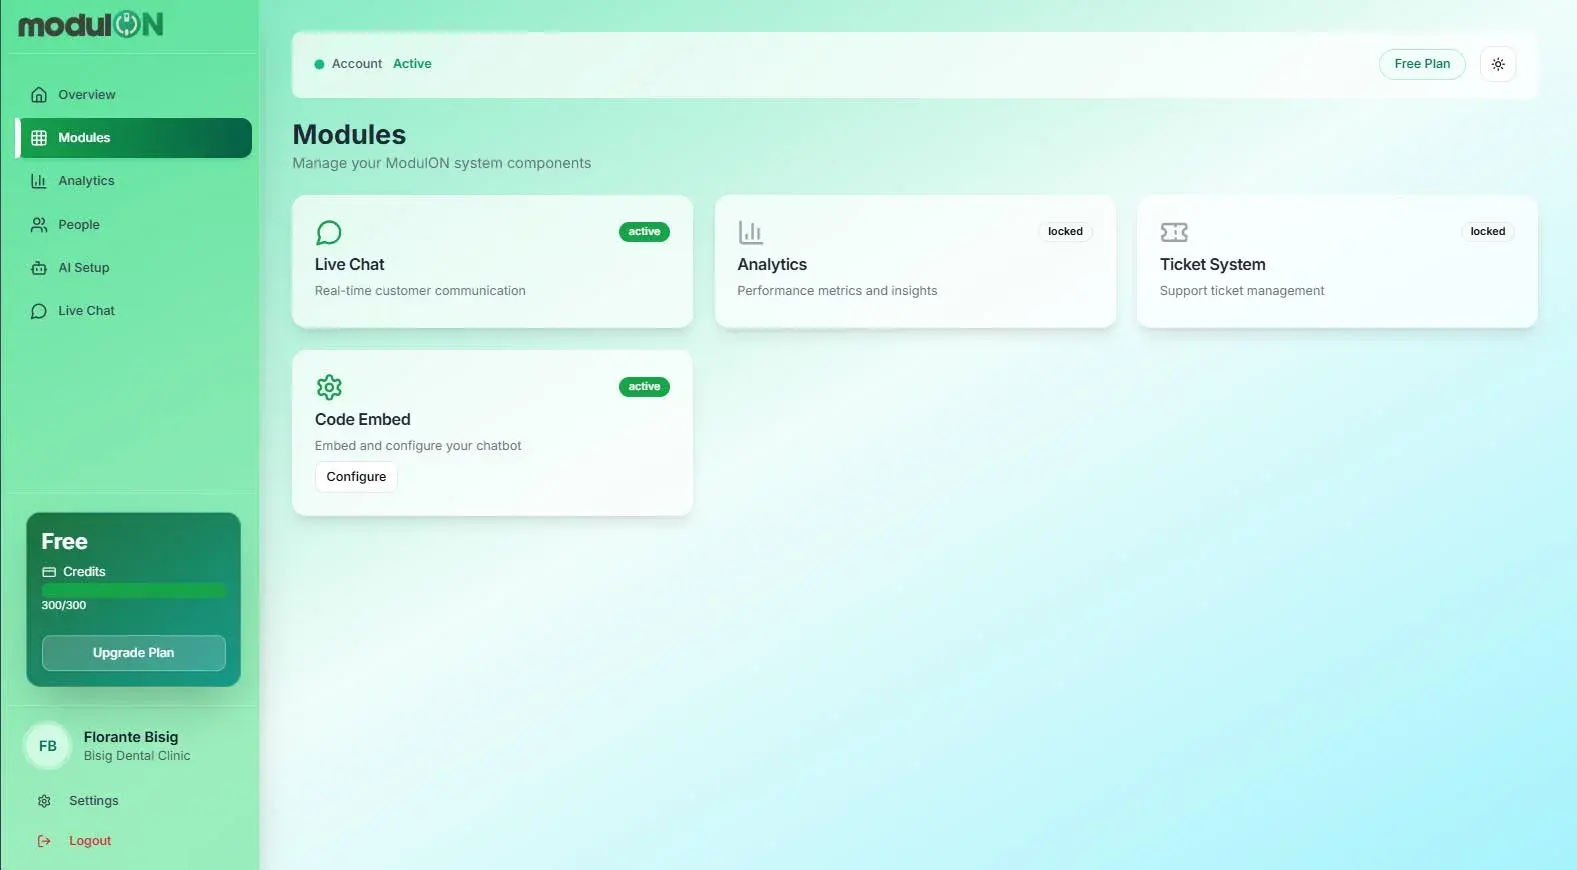
Dashboard - Modulon AI ChatBot
API Key
Step 5: Creating Your First API Key
A. Click Modules
B. Check Right Pane for Code Embed Panel
C. Click configure button
In the Embed Chat Widget modal.
Click Create New Tab.
Select your Platform
Add your Base Domain
Remove www or https://. Example: modulonai.com or app.modulonai.com.
Important Notes:
Each API key is bound to the domain you add.
Keys cannot be reused across different domains.
For every new domain, you must generate a new API key.
Retrieve Your Widget Script
Go to the Existing Widget Tab.
Copy the provided <script> tag.
This script is ready to use for most platforms.
Embed the Script in Your Website
Paste the script into your site’s code. You can insert it in:
Header (loads early, good for global availability).
Body (loads with page content).
Footer (loads last, reduces impact on page speed).
Placement depends on your platform’s structure. Check your CMS or hosting guide for exact instructions.
Note: If your website has CSP. Do check what to add in this post..
Note: For ReactJS/NextJS platforms you have to use <Script>. Complete instructions in this post.
Or you can check full guide below for each platform.
Upcoming:
FB Messenger - In Pipeline: Rollout pending.
Instagram - In Pipeline: Rollout pending.
WhatsApp - Not Yet in Pipeline
Viber - Not Yet in Pipeline
Telegram - Not Yet in Pipeline
X (Twitter) - Not Yet in Pipeline - Limited Option maybe Discarded. DM automation possible but API access is restricted and often paid.
Tiktok - Not Yet in Pipeline - Limited Option maybe Discarded. Direct chatbot integration in DMs restricted
Verify Installation
Save and publish your changes.
Visit your site and confirm the ModulON AI chat widget appears.
Test the chatbot to ensure it responds correctly.
You’ve successfully installed the ModulON AI chatbot. Your visitors can now interact with your intelligent assistant, boosting engagement and support efficiency
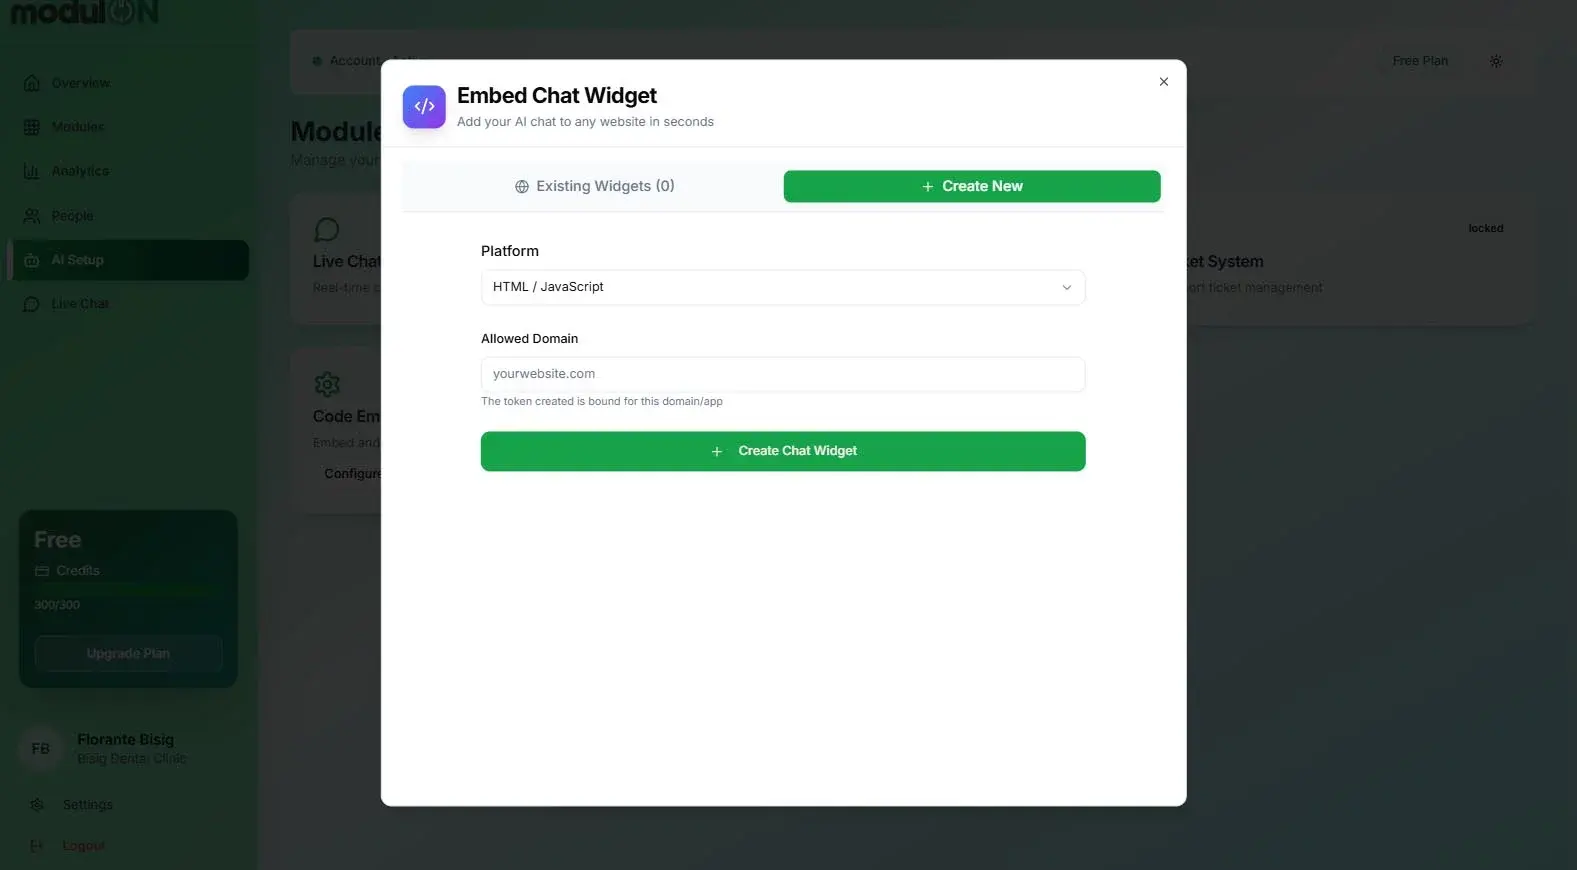
Embed Widget 1 - Modulon AI ChatBot
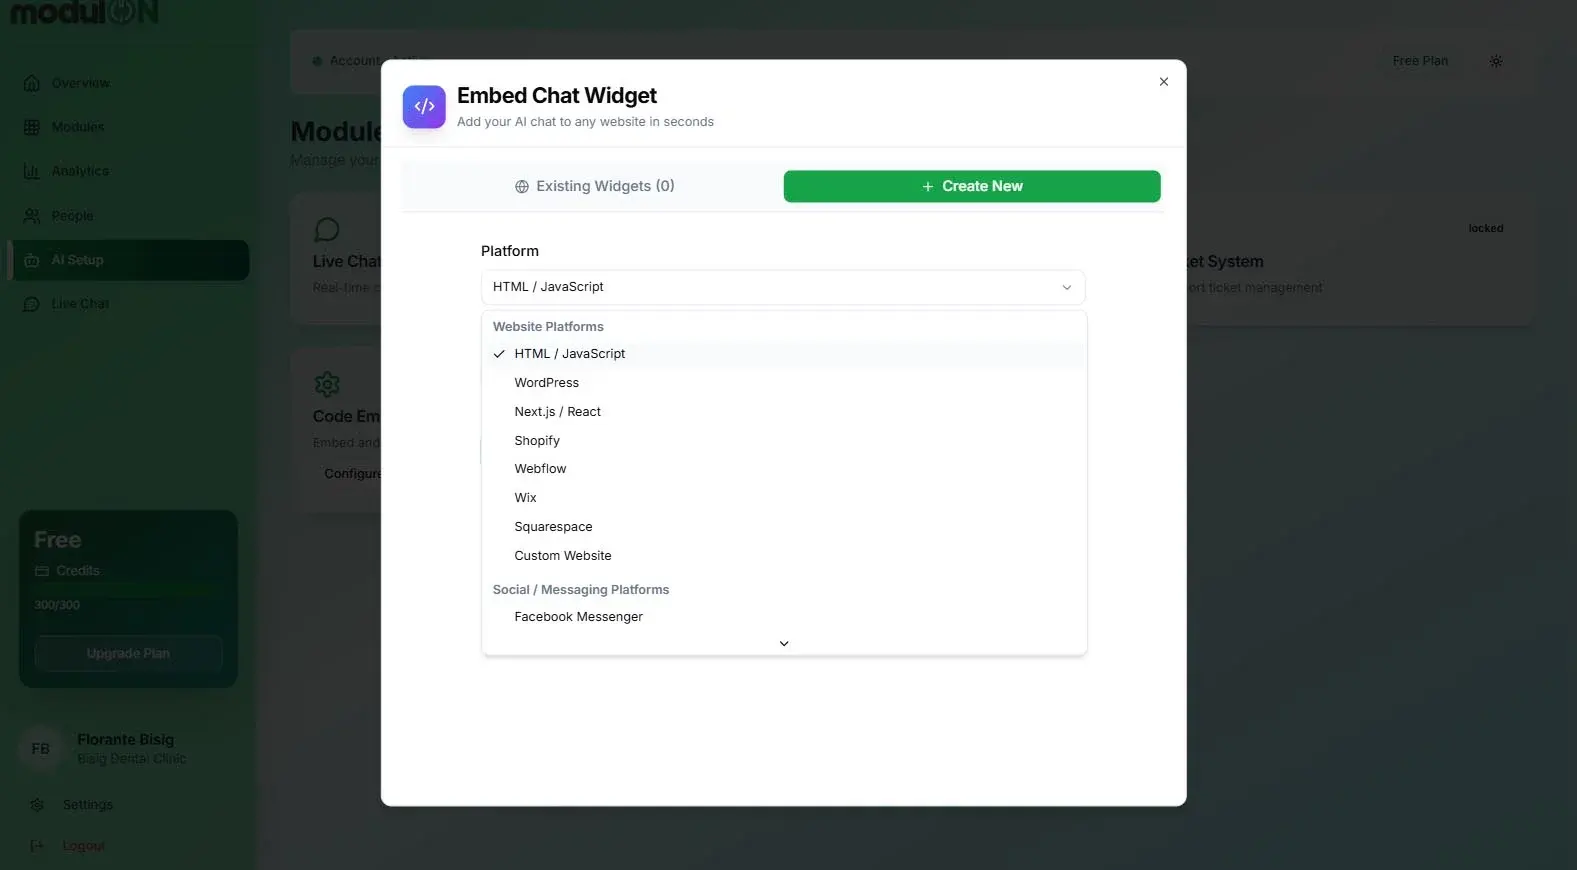
Embed Widget 2 - Modulon AI ChatBot
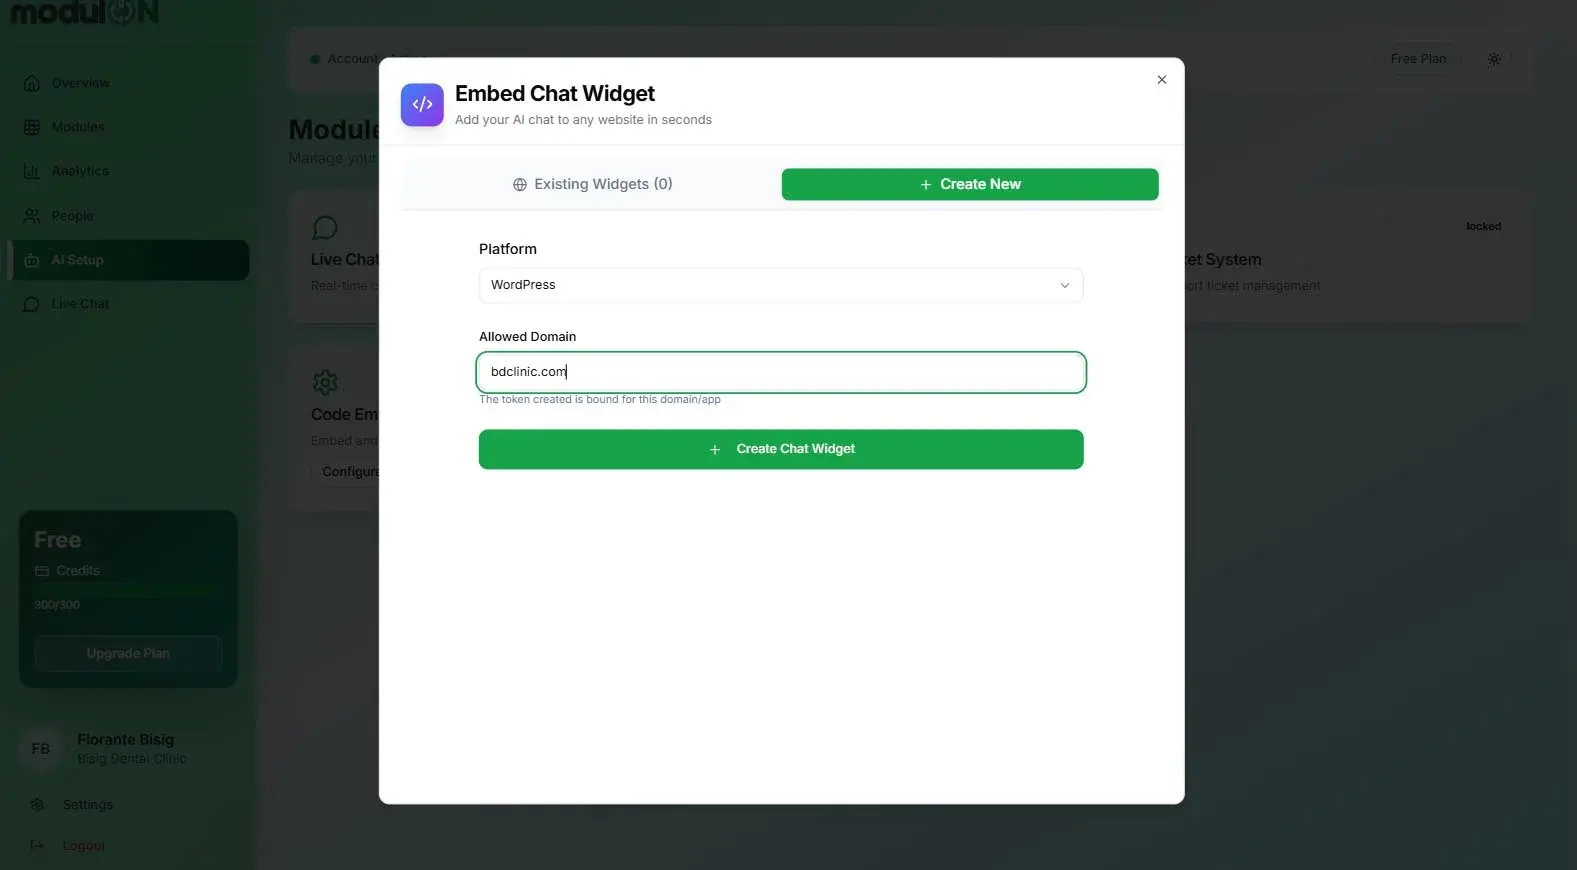
Embed Widget 3 - Modulon AI ChatBot
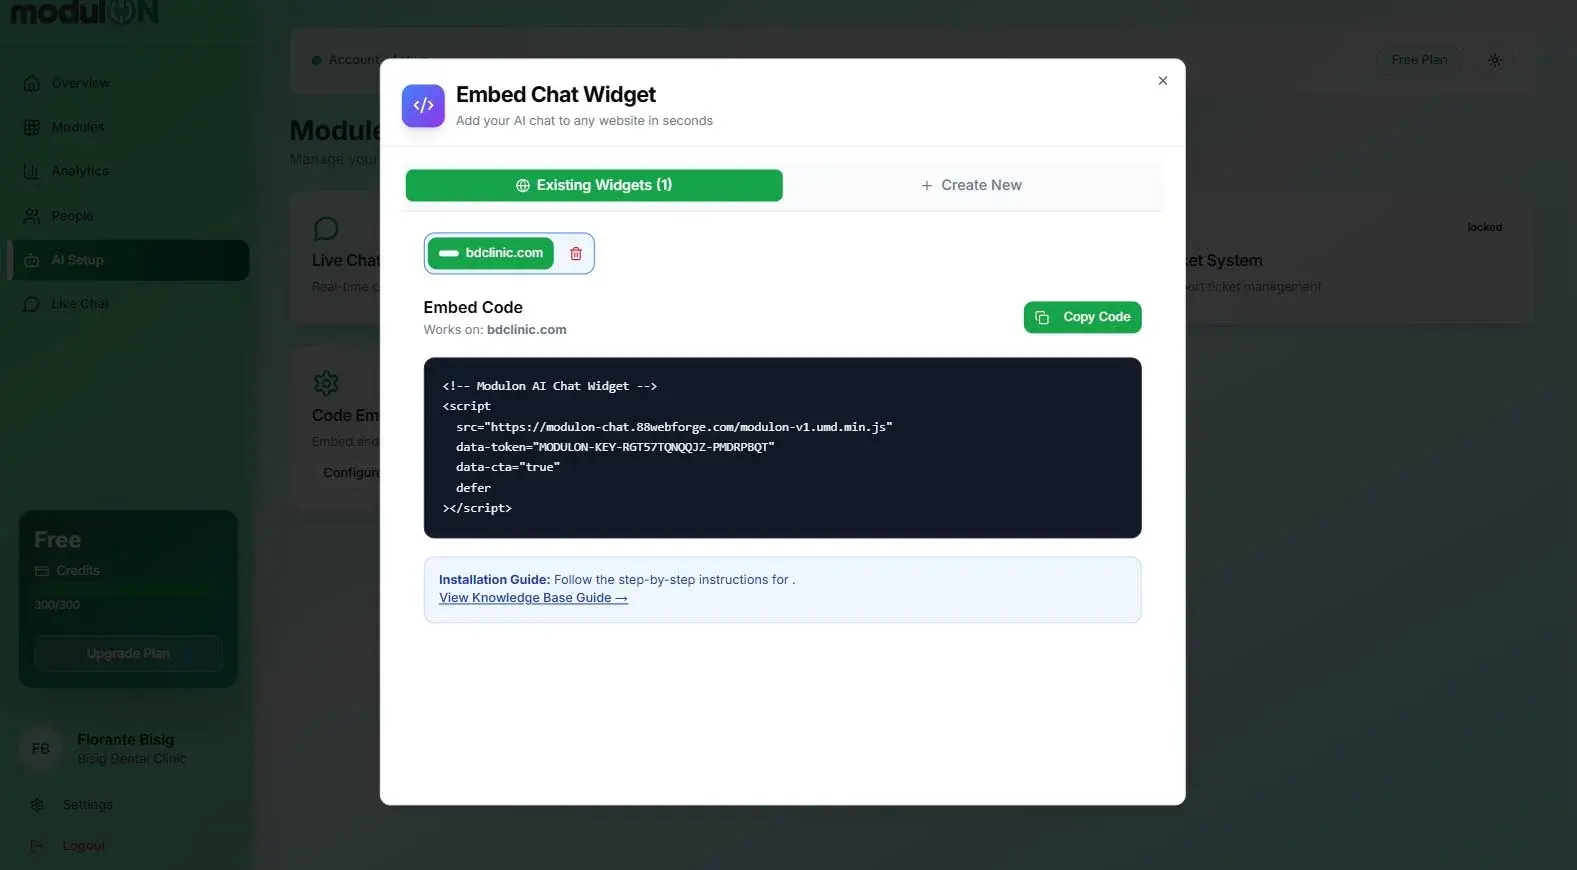
Embed Widget 4 - Modulon AI ChatBot
Customize the Widget
Step 6: Customize Your Chat Experience
Adjust widget styling in the dashboard.
Configure greetings, FAQs, or automated flows.
Align the chatbot’s tone and branding with your business identity.